Happy St. Patrick’s Day!

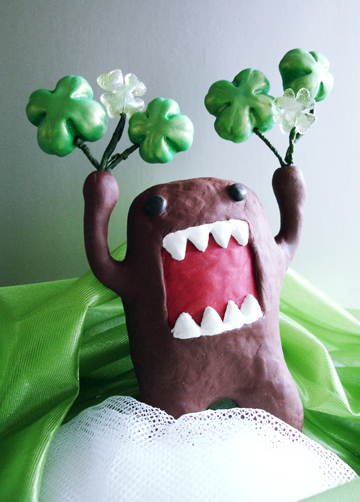
Domo St Patricks Day

Domo’s back to celebrate St. Patrick’s Day! With the luck of the Irish he managed to fine handfuls of four leaf clovers!

These particular fields of clover are a mix of sculpted polymer clay dusted with a light coat of metallic powder and smaller clovers that were cast resin mixed with a bit of green pigment and a dash of metallic powder.

Now that Domo found the four leaf clovers…now he’s off to find that pot of gold…

Comments Off on Happy St. Patrick’s Day!

Filed under Uncategorized

Double Gold Hoops with Chains and Charms

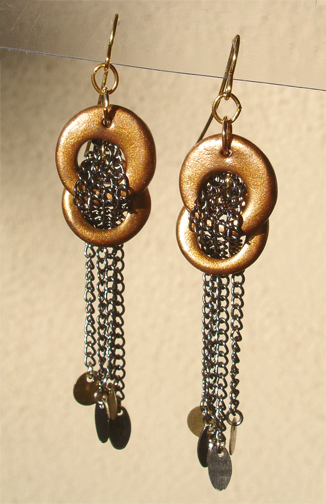
double gold loops with chains and charms

These earrings were constructed out of several components. First I sculpted two hoop shapes in polymer clay and finished them with some metallic powder. Once again I harvested parts from necklaces and other jewelry that I take apart and reuse. This time I chose fine chains and some tiny round and oval charms. I attached the bottom gold hoop and the chains to a jump ring on the back of the top loop. Once attached to the back, the chains were gathered and threaded through the hole in the bottom hoop to weave the two hoops together.

There are a lot of textures and a lot of movement to these earrings, and I can see a lot of potential for variations on this basic design.

2 Comments

Filed under Jewelry, Sculpting

Happy Valentine’s Day!

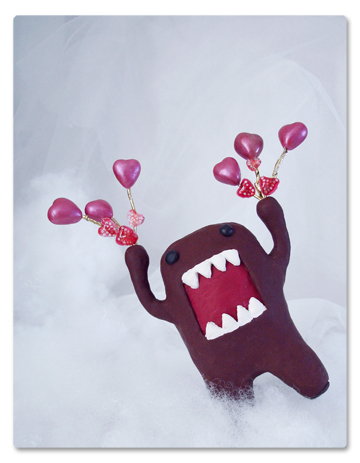
Domo Valentine

Putting Domo to work again to celebrate Valentine’s Day!  He’s holding bouquets of hearts sculpted from polymer clay that were dusted with metallic powder. The smaller hearts are red and pink tinted resin and have tiny clear glass beads embedded inside.  Floral wire wrapped with gold metallic ribbon are attached to the hearts.

Get outta the way– looks like he’s in a rush!

Comments Off on Happy Valentine’s Day!

Filed under Domo, Sculpting

Glamour and a Haul Pass

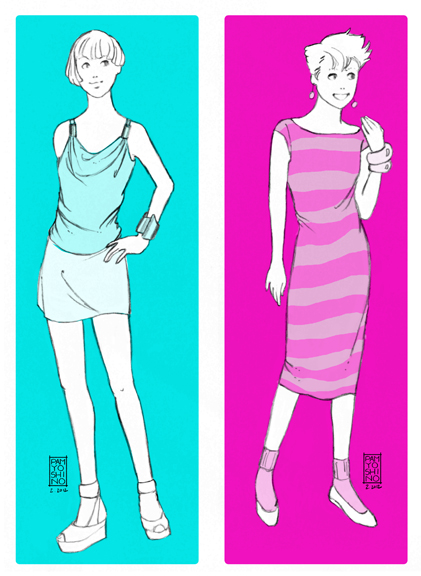
This is going to be a mashup of sorts…my first Haul Pass entry, but in a style that pays homage to one of my favorite artists I had growing up. First…what’s a Haul Pass? It’s basically something I’ve seen while out shopping but decided not to get (but will probably regret later.)

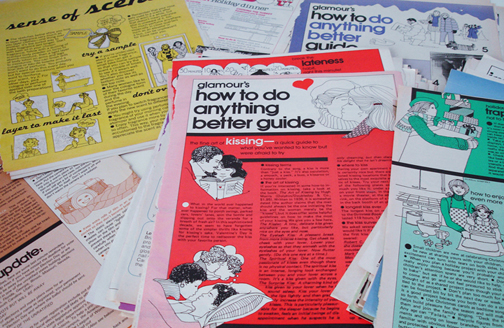
Years ago, my sister subscribed to Glamour magazine and I noticed illustrations every month that I loved! So when she was done with each issue I’d tear out all the pages that had illustrations on them and kept them in a folder. I loved the simples lines of each image, but that they still contained so much detail. The characters always looked like they were having so much fun! Most of the illustrations were in a section in the middle of each issue that was called “How To Do Anything Better Guide.” Durell Godfrey was the illustrator’s name. I enjoyed just looking at the illustrations, but also tried to mimic the style when sketching and drawing.

Fast forward to a few months ago. I decided to finally try to use Facebook a bit more and was looking up random people. I don’t know why, but Durell Godfrey’s name popped into my head so I typed it in the search and someone came up!  It’s such a unique name and figured it had to be the same person, but sent a message and asked. It was her! She was extremely friendly and nice. We exchanged a few messages and I learned more about her, and how she concentrates on photography now. Not only is she a great illustrator, but takes fantastic photos as well! Wow, I can’t tell you how excited I was! I had stared at all those pictures in that file folder for years and still have them to this day!

How To Do Anything Better Guide pages

The same week I found Durell on Facebook, I was out shopping and a top caught my eye. Totally not my style and maybe even a bit 80’s disco influenced. It had silver metallic tubes that gathered the straps on the front and the material was very slinky. I tried it on and it looked okay, but again…not my style. So I passed. I also saw a *very* 80s looking striped knit dress. I held it up and chuckled a little then put it back.

Ding! I decided to do illos of the top and dress, but try to do it in Durell’s style to keep that 80s vibe going.

80s top and dress illos

Oh, by the way, I’m still seeing those tops in the stores in tons of colors and made by different labels…but I still haven’t bought one…


4 Comments

Filed under Haul Pass, Illos

Recycled Jewelry? Sort of…

Although I do find components for jewelry at bead stores and big chain craft stores, I prefer to take apart existing jewelry and harvesting bits and pieces from them. It’s not that I’m consciously trying to be ‘green’ or anything– even though that is a plus–but more the fact that it can be more thrifty and provide more variety that way. I search the clearance jewelry sections at all types of stores, and garage sales are always a good bet. The best was the time I was doing a morning run through the neighborhood and ran past a garage sale. Some vintage jewelry caught my eye, so I ran home, grabbed some cash, ran back and nabbed the pieces!

So, here are some examples of earrings made with harvested components. Below are two earrings and one necklace I found at different stores:

harvested jewelry

Right now it’s great because the trend is necklaces with all sorts of different charms, beads, chains etc. These particular pieces weren’t too packed with different types components, but I’ll be ‘vulturizing’ other pieces I have soon…

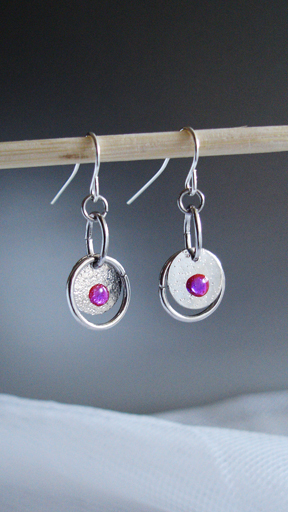
This first pair or earrings used jump rings and silver discs, and I added some resin mixed with alcohol based dye to add a pop of color.

round silver discs with magenta accent

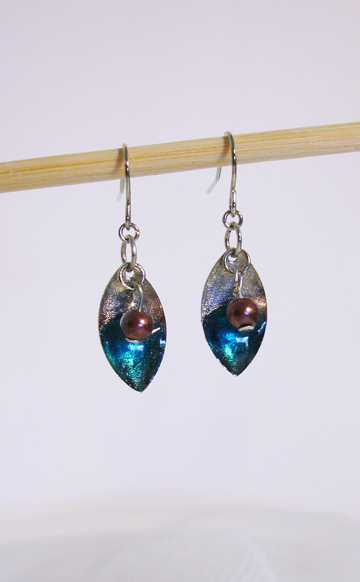
The next two pieces used silver leaf shapes harvested from a pair of very long, dangly earrings. For the blue pair, I used blue tinted resin and added a copper metallic glass bead.

blue leaf copper bead

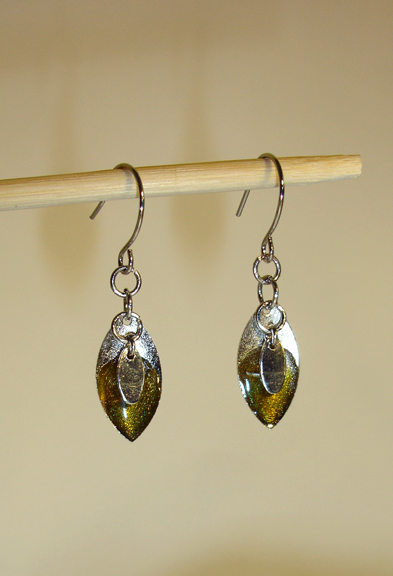
The other leaf shaped earring has a combo of some amber colored tint in the resin with a tiny bit of metallic powder to add a bit more interest. I added a small silver oval charm that I took from a long necklace.

amber leaf and charm

Another plus:  pieces loaded with charms and other components means lots of jump rings of different sizes, and necklaces mean a clasp that can be used later on other bracelets or necklaces. Everything can be reused on something!


Comments Off on Recycled Jewelry? Sort of…

Filed under Jewelry

UV Resin Curing Contraption

I have really been enjoying my experimentation with UV Resin, but when summer ended, so did available sunlight to cure the resin! So, I decided to look for a UV light. Most are basically those little machines used to dry acrylic nails, and are super tiny.

While looking around on the net I found a site by Gera Scott Chandler called, ‘a Mused Studio.’ She had a couple of posts on her site about a UV Resin curing ‘oven’ that she built! She had ordered her own UV light, so I did some research and learned more about fluorescent lights than I ever thought I would in my lifetime. hahaha! One of the comments on her post mentioned going to the pet store for a light, and I learned that UV lights are used in reptile cages to keep them healthy. Ding!Ding!Ding! I decided to try to construct something myself. I used some of the same ideas Gera used, but deviated a bit as well.
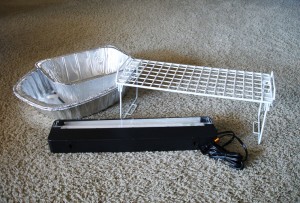
foil trays wire rack and fluorescent light

Here are the basic components I used: a plastic-covered wire pantry shelf, a couple of foil roasting pans and an 18″, 15 watt, 50 UVB T8 fluorescent light used for pet reptile terrariums. I also used a bit of wire, duct tape, foil and the lid from a shirt box.

Gera must’ve really thought long and hard about how to construct her oven, because she figured out the best way to make the basic structure. Those plastic-covered wire pantry shelves are the perfect solution for a structure that suspends the UV ballast above the pieces to be cured. I attached the ballast to the wire shelf using 22 gauge floral wire. As Gera suggested, I also removed the clear plastic guard over the fluorescent bulb to get maximum UV light exposure while curing the resin.
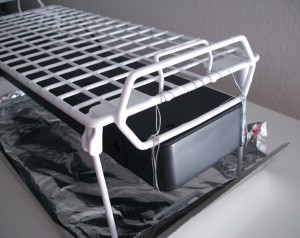
wiring closeup

For the lid, I used two of the largest foil roasting pans I could find at the dollar store and molded them to fit the width of the basic structure so it’d fit over it like a lid. Since one pan wasn’t long enough, I cut the ends off of each pan. It’s very easy to score the pans with a screwdriver.
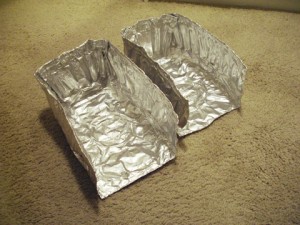
cut foil trays

Then I used duct tape to to join the two pans together so it just fits over the wire shelf and ballast. I also duct taped the scraps that were cut off the ends to cover gaps in the middle of the lid.
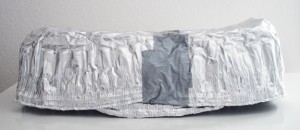
lid

To make a simple base so all of the UV light is contained, I found a shirt gift box lid that was the perfect width. It was a bit short, so I unfolded one end. It’s lined with tin foil, but mylar tissue wrap could be used and be more durable. Two more shallow foil pans could also be cut and molded to create a base, but time was of the essence (see my Domo sculpt posts,) so I used the box lid.
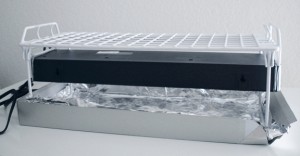
light and base

Now it’s all ready to cure the resin! Just put pieces to be cured on the foil box base and place the wire shelf structure over it. You can adjust it back and forth to get maximum light coverage. Then place the foil pan lid over the base and plug in the light.

Okay, so it’s not the prettiest. It kind of looks like an Airstream trailer, but it does the job beautifully!

UV Contraption and airstream

…UV resin curing contraption, or Airstream trailer…you be the judge.


2 Comments

Filed under Jewelry, Sculpting

Happy New Year!

Domo New Year

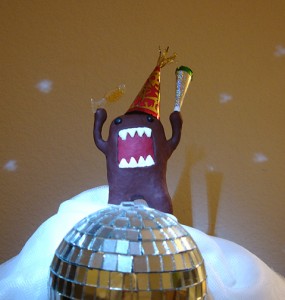
Domo was done with Christmas tree duty, so he partied hearty on New Year’s Eve (with sparkling grape juice, of course.)

3 Comments

Filed under Sculpting

Ho Ho Domo!

domo on top of christmas tree

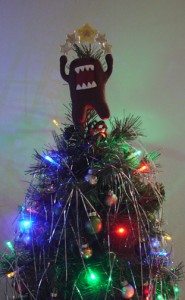
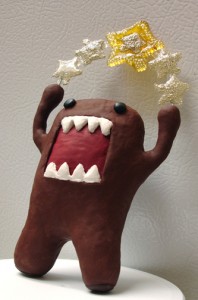
This year I finally sculpted the Domo star for my little Christmas tree. I have had the basic idea in my head for a couple of years now, believe it or not. He’s sculpted out of polymer clay. The stars were made out of the UV Resin I am really loving right now. I added accents on the stars by applying tiny silver beads into the resin before it was cured. Yellow alcohol based pigment was used on the big star in the middle, then the tiny silver beads were shaped into an inner star shape on top.

Here’s another shot of Domo on the tree, taken with the flash so he’s easier to see.

domo star closeup taken with flash

He’s attached to the tree with floral wire that I wrapped with green floral tape so it would blend in with the tree. The wire was coiled into a tight spiral so that it could be wrapped around the tree and the end is inserted in a small hole I made in Domo’s right foot.

One last shot in better light where the stars are more visible

domo star closeup isolated

Happy Holidays!

5 Comments

Filed under Sculpting

Pie crust thingies

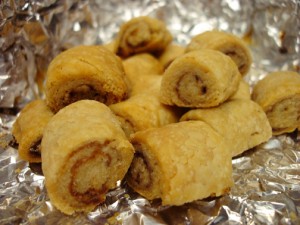
pie crust thingies

Every Thanksgiving I am responsible for the pumpkin and apple pies since I’m the only one that can seem to come close to reproducing the super flaky and awesome crust my mom made. (Thank goodness I paid attention when she baked pies!)

This year I had a little bit of pie crust dough left over. Every time this happens, I always make pie crust roll-up thingies. My mom used to make them. Basically you roll the dough out into a rectangle then scatter little pieces of butter all over it. Next you sprinkle sugar and cinnamon over the entire thing, then roll up the dough, starting at the long end so it sort of looks like a jelly roll. Then you cut them into about 1″ long pieces, place them on a cookie sheet and bake until they are golden and flaky.

Warning: they are addictive.

Happy Thanksgiving!

2 Comments

Filed under Food

Tiny clear squares with aqua and gold

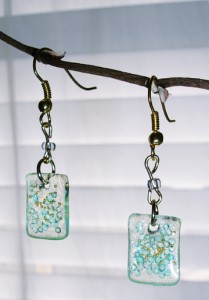
Here’s another pair of earrings. This time I used resin and embedded tiny glass aqua beads and even more tiny gold beads.

resin squares with blue glass beads and gold beads

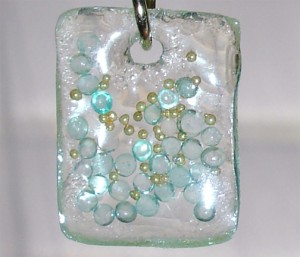
Here’s a close up showing the mix of beads floating in the clear resin. (sorry about the glare.)

closeup of resin square with blue glass beads and gold beads

5 Comments

Filed under Jewelry